


My father was German, and he was very particular with his foods, especially sauerkraut. This time of year is just before spring planting in our area. But for the food co-op I am a part of, there is fresh cabbage available in large quantities. I have come to realize that I am unable to grow everything I want all the time. I work with what I have and what I can do.
I like to purchase 40 pounds of cabbage to make sauerkraut. Making sauerkraut is a relatively simple fermentation process. That does not mean it will always come out perfectly. Now, I have made batches in the past that were perfect. Then some, my dad would say, needed to be more sour. Leaving the sauerkraut to sit longer can ferment it more, making it more sour. However, I have also taken the other extreme. Instead of leaving the cabbage to ferment for four to six weeks, I left it for three months. Subsequently, it dried out and became buggy. The chickens had a feast. If you have read my sourdough article, you will know that I tend to make large batches. When a batch flops, it flops big, and the chickens clean up, literally.

Sauerkraut Origins: From Ancient China to German Cuisine
Though we often associate sauerkraut with German cuisine (the name itself means “sour cabbage” in German), its origins stretch back over 2,000 years to Northern China. Chinese laborers building the Great Wall reportedly fermented cabbage in rice wine as a way to preserve it. The technique gradually spread westward along trade routes, eventually reaching Europe, where it became firmly established in Eastern and Central European culinary traditions.
By the 16th century, sauerkraut had become a staple in Germanic countries, valued not just for its distinctive flavor but for its remarkable keeping qualities. In an era before refrigeration, the ability to preserve vegetables through the harsh winter months was essential for survival. Barrels of fermenting cabbage in root cellars sustained families through long winters when fresh produce was unavailable.
Captain James Cook even took barrels of sauerkraut on his sea voyages in the 18th century, using it to prevent scurvy among his crew—an early recognition of its nutritional benefits long before the discovery of vitamin C.
A Nutritional Powerhouse
Modern science confirms what our ancestors knew instinctively: sauerkraut is highly nutritious. The fermentation process creates a probiotic-rich food that supports gut health.
During fermentation, lactic acid bacteria, found naturally on cabbage, multiply and produce lactic acid. This gives sauerkraut its tang while preventing harmful bacteria growth.
Sauerkraut contains vitamins C, B, A, and K, plus minerals like iron, manganese, and potassium. It provides dietary fiber, antioxidants, and probiotics that improve gut flora.
An important note is that fermentation increases nutrient bioavailability. The bacteria predigest complex compounds into more usable forms. This means nutrients are easier to absorb from the fermented cabbage than from the raw cabbage.
Gathering Your Ingredients and Equipment
Making sauerkraut at home requires minimal ingredients but careful attention to your equipment choices. Let’s start with the essentials:
Ingredients
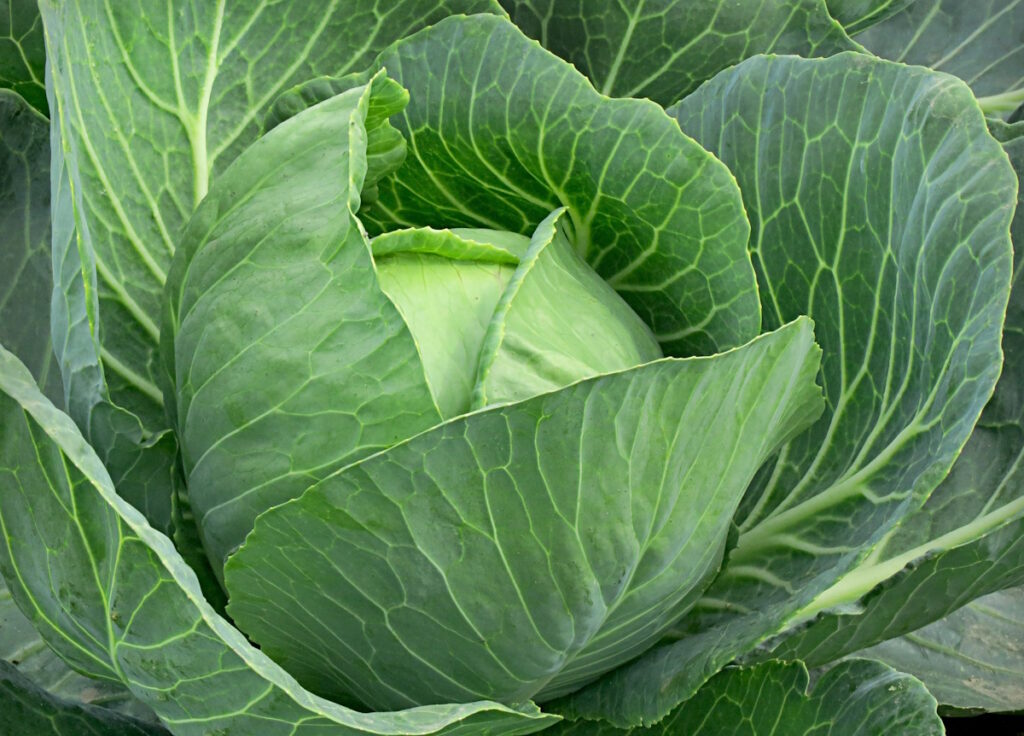
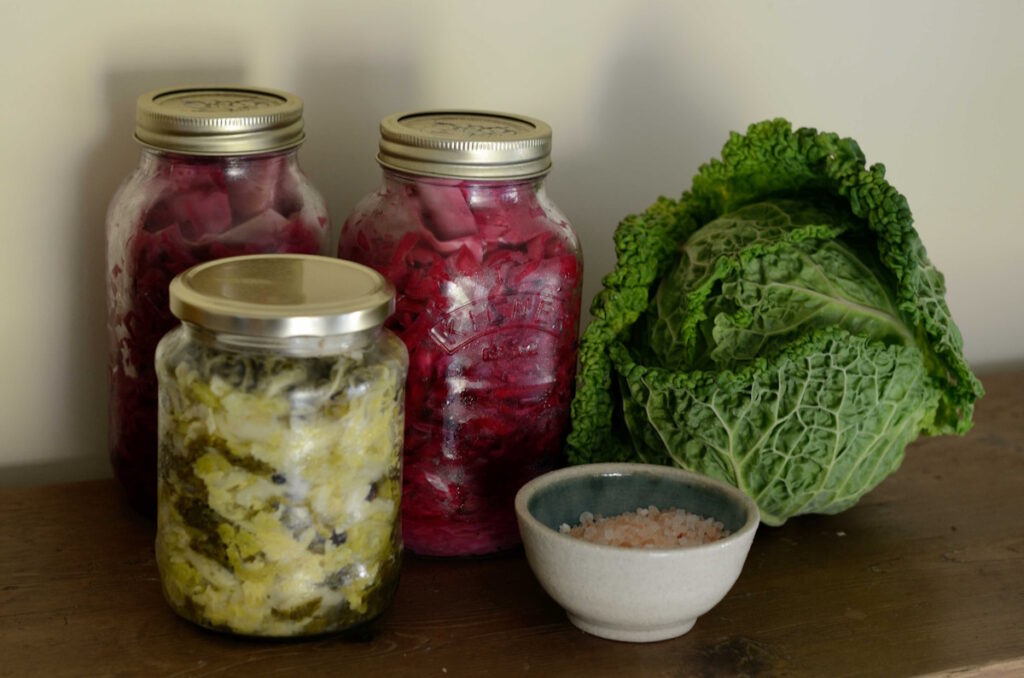
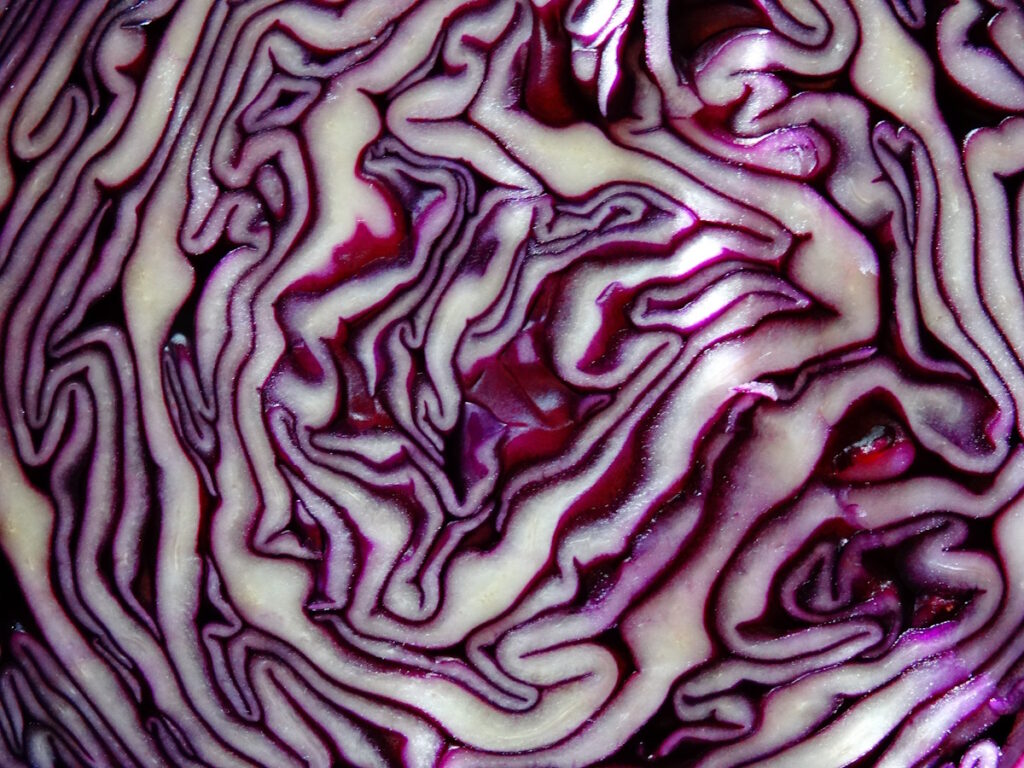
- Cabbage: Green cabbage is traditional and produces a softer sauerkraut. Red cabbage creates a firmer texture and striking color, though it tends to be drier and requires more work to extract the juice.
- Salt: Sea salt or Himalayan salt is ideal. Avoid table salt with anti-caking agents or iodine, as these can interfere with fermentation. The salt serves multiple purposes: it draws moisture from the cabbage to create brine, inhibits unwanted bacteria during the early fermentation stages, and contributes to flavor.
That’s it—just cabbage and salt! These simple ingredients might not seem like much, but they kick off a surprisingly complex chemical process.
Equipment
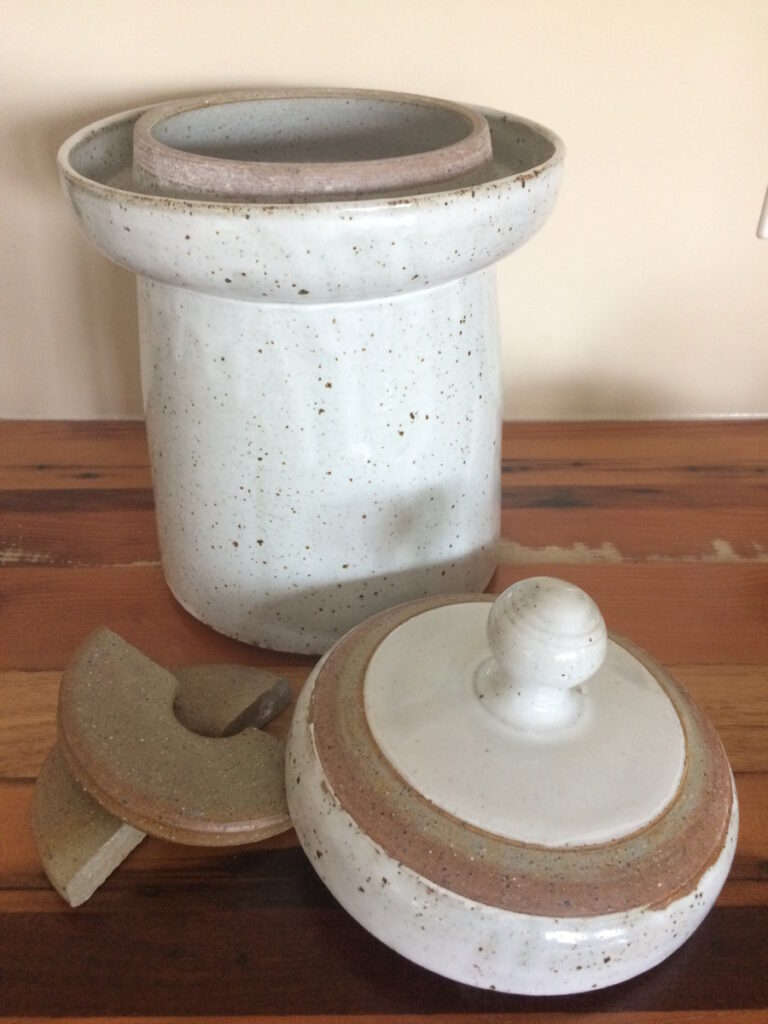
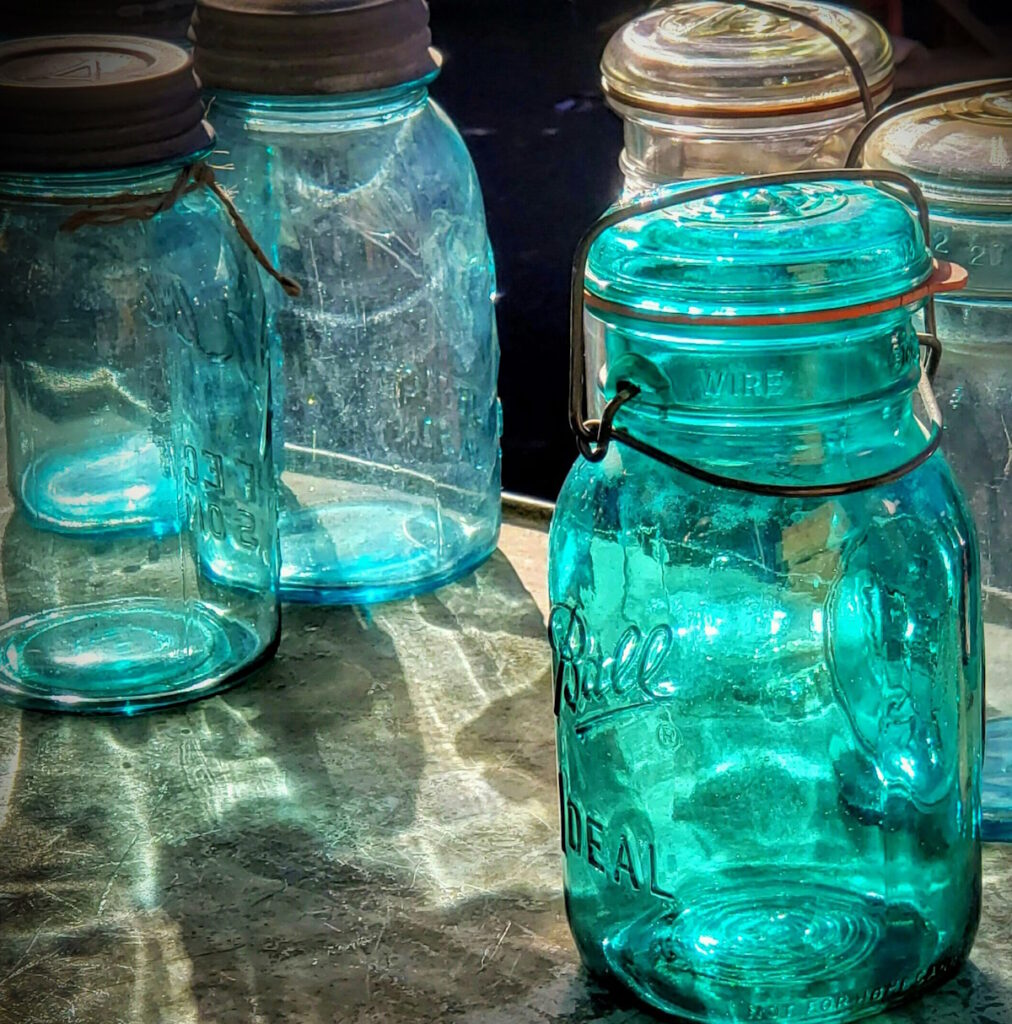
- Fermenting vessel: A stone crock, glass jar, or food-grade plastic bucket works well. The critical factor is avoiding metal containers, which can corrode from the salt and acid while potentially inhibiting the fermentation process.
- Cutting tools: A sharp knife, grater, or food processor for shredding the cabbage.
- Stomping tool: Traditionally, a wooden tool like an unfinished baseball bat works perfectly. We used an old wooden baseball bat growing up. Make sure it is clean and that there is no lacquer or varnish on it. The goal is to bruise the cabbage fibers to release the liquid.
- Weights: Something to keep the cabbage submerged beneath the brine—a ceramic plate that fits inside your fermenting vessel, coupled with a water-filled jug.
- Cover: A cloth cover keeps dust and insects out while allowing carbon dioxide to escape.
The Step-by-Step Process of Cabbage Transformation
Preparation: Setting the Stage for Fermentation
Begin by washing your cabbage heads thoroughly and removing the outer leaves—but don’t discard them! Set these aside to use later as a protective covering for your fermenting cabbage.
Quarter each head and consider if you’ll remove the cores. Contrary to what many recipes suggest, the cores can be included—they shred up fine and add volume to your batch. This “waste not, want not” approach feels aligned with the traditional homesteading philosophy behind fermentation. Sorry, chickens, there will not be much for you to clean up on this recipe.
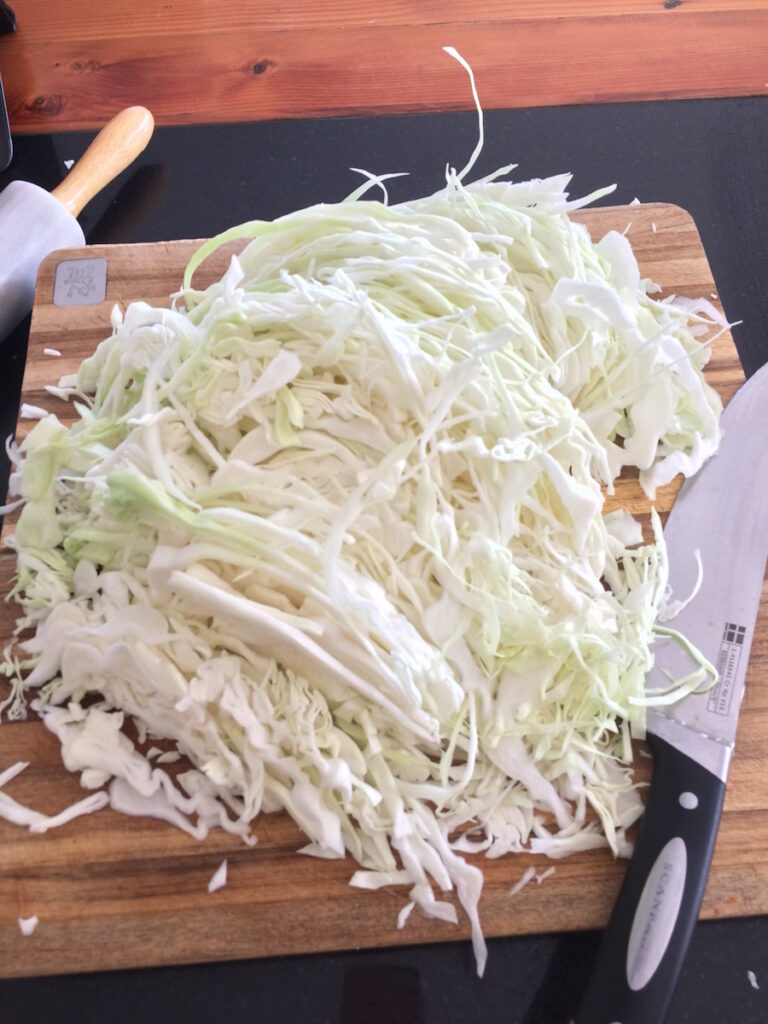
Using a food processor or mandoline slicer, shred the cabbage finely. The finer the shred, the more surface area is exposed, which facilitates better brine development. Working in manageable batches of 5-6 pounds, place the shredded cabbage in a large bowl or tub.
The Dry Salting Method: Coaxing Out the Brine
For each 5-6 pounds of cabbage, measure out approximately ¼ cup of salt. Sprinkle it evenly over the shredded cabbage and mix thoroughly with clean hands. The salt immediately begins drawing moisture from the cabbage cells through osmosis.
Let this mixture rest for about 30 minutes—this patience pays dividends in brine production. You’ll notice the cabbage becoming limp and wet as the salt does its work. This is the beginning of your brine, the liquid medium that will enable fermentation while protecting your cabbage from spoilage.
Stomping: The Heart of Traditional Sauerkraut Making
Transfer your salted cabbage to a food-grade plastic bucket for the next critical step: stomping. This step sets homemade sauerkraut apart from commercial versions and connects us to traditional methods.
Using a wooden stomper or the favored baseball bat method, begin vigorously pressing and crushing the cabbage. Each stomp ruptures cell walls and releases more liquid. The goal is simple but essential: produce enough juice to completely submerge all the cabbage.
Red cabbage typically requires more vigorous and prolonged stomping due to its drier nature. Don’t get discouraged—persistent stomping will eventually yield the necessary brine. One friend of mine observed that letting the cabbage “rest” in the salt for 30 minutes or so seemed to help the juice to run after a shorter stomping period. This process may take a good 20, 40, or 60 minutes. If you have older children, involve them in this step.
You’ll know you’ve stomped sufficiently when you can press down on the cabbage and brine rises to cover it completely. If, despite your best efforts, you don’t achieve enough liquid, you can prepare additional brine (1/8 to 1/4 cup salt dissolved in 4 cups of water) to supplement what the cabbage produces naturally.
Packing: Creating an Oxygen-Free Environment
Once your cabbage is adequately juicy, transfer it to your clean fermenting vessel, leaving about eight inches of headspace to accommodate the expansion that occurs during fermentation. Pack the cabbage down firmly, eliminating air pockets that could harbor unwanted microorganisms.
Now comes an essential traditional technique: take those reserved outer cabbage leaves and press them down over the surface of your shredded cabbage, tucking them around the edges. These leaves make a natural seal that helps keep oxygen out while allowing carbon dioxide to escape—creating the anaerobic environment in which lactic acid bacteria thrive.
Weighting: Ensuring Submersion
Place a plate, wooden lid, or other food-safe barrier atop the cabbage leaves. If using a plate, be sure it is a sealed, ceramic plate. Using other types of painted or plastic plates can leach harmful chemicals into the brine. If using a wooden lid, be sure there are no metal nails or glue exposed to the brine. This barrier needs to be weighted down to keep the cabbage from floating to the top of the brine during the fermentation process. A clean glass jar filled with water or vinegar works excellently as a weight.
Remember to place your fermentation vessel in a shallow basin, like an enameled pan, to catch any overflow that may occur during active fermentation. Finally, drape a clean cotton cloth over everything to keep out dust and insects while allowing the fermentation gases to escape.
Fermentation Stages of Sauerkraut
Once your sauerkraut setup is complete, place it in a location with a stable temperature—ideally between 65-75°F (18-24°C). Now begins the fascinating multi-stage fermentation process, driven entirely by microorganisms naturally present on your cabbage.
Stage One: The Initial Bloom (Days 1-3)
Within 48 hours, bubbles form in the brine as fermentation begins. The mixture develops a frothy appearance and fermented aroma. Salt prevents harmful bacteria growth while allowing lactic acid bacteria to multiply. These beneficial bacteria consume cabbage sugars and produce lactic acid, creating an increasingly acidic environment.
Stage Two: Lactic Acid Dominance (Days 4-14)
Increasing acidity allows Leuconostoc bacteria and then Lactobacillus species to thrive. These bacteria create an environment that prevents harmful growth. Bubbling intensifies, potentially causing overflow. The aroma becomes increasingly sour and complex.
Stage Three: Maturation (Weeks 3-6)
Fermentation slows as sugars deplete. The mixture continues acidifying, developing complex flavors from various Lactobacillus strains. Completion time varies with temperature—2-3 weeks in warm conditions, 5-7 weeks in cooler environments.
Monitoring and Troubleshooting
While fermentation is a largely self-regulating process, regular monitoring helps catch and correct potential issues. After the first two weeks, you may carefully remove the cloth cover and check for any surface mold or scum. If present, simply skim it off—the acidic environment below the brine should remain protected.
This is also an opportunity to taste-test your sauerkraut. Insert a clean utensil deep into the ferment, avoiding disrupting the protective cabbage leaf layer as much as possible. The sourness should be developing nicely, though it may not yet have reached the intensity you desire.
If you decide it needs more time, carefully replace everything exactly as it was—weights, cloth cover, and all—and continue fermentation. Remember my cautionary tale: my father might have preferred a longer fermentation for added sourness, but my three-month experiment resulted in dried-out, buggy cabbage that only the chickens would eat! Balance is key.
Storage Options to Preserve Your Probiotic Treasure
Once your sauerkraut reaches your desired level of fermentation, you have several storage options, each with different implications for the probiotic content and texture:
Refrigeration: Preserving Live Cultures
My preferred method is transferring the finished sauerkraut into clean glass jars—quarts, half-gallons, or gallons—packed with brine and stored in the refrigerator. The cold temperature dramatically slows fermentation without stopping it completely, allowing flavors to continue developing subtly for months.
Most importantly, refrigeration preserves the living probiotic cultures that make sauerkraut so beneficial for gut health. In my experience, properly refrigerated sauerkraut maintains excellent quality for up to a year.
Freezing: Long-Term Preservation
Freezing effectively halts the fermentation process and preserves the flavor profile exactly as it was when frozen. While freezing doesn’t destroy the beneficial bacteria, it does put them into dormancy. The texture of thawed sauerkraut can be slightly softer than refrigerated versions, but the flavor remains intact.
Traditional Canning: A Historical Approach
Growing up, we always canned our sauerkraut using a pressure canner—15 minutes at 5 pounds pressure for quarts, 10 minutes for pints. This method provides shelf stability without refrigeration, which was essential before modern refrigeration was common.
However, I’ve moved away from this approach since learning that the high temperatures necessary for safe canning kill the beneficial probiotic bacteria. If you choose this method for space or convenience reasons, recognize that while many nutritional benefits remain, the living probiotic aspect will be lost.
Serving Suggestions: Beyond the Traditional
While sauerkraut traditionally accompanies German sausages, pork dishes, and rye bread, its culinary applications extend far beyond these classics. As I’ve grown to appreciate its probiotic benefits, I’ve found numerous ways to incorporate it into daily meals. First, try adding a forkful to green salads for a tangy crunch. Additionally, it works wonderfully as a topping for sandwiches and wraps—especially as the essential component that completes a perfect Reuben sandwich, where its tanginess cuts through the rich corned beef and Swiss cheese. For a refreshing side salad, mix it with shredded apples and a touch of caraway seed. Serving kraut alongside meats aids digestion. Also, it adds a delightful flavor contrast to grain dishes.
Remember, to preserve the probiotic benefits; avoid heating sauerkraut when possible. Cold or room temperature serving ensures the beneficial bacteria reach your digestive system intact. This represents a departure from how we ate it in my childhood—always heated—but aligns with modern understanding of probiotic benefits for the gut.
Sauerkraut Around the World: Global Variations
While we often think of sauerkraut as distinctly German, fermented cabbage appears in culinary traditions worldwide, each with unique characteristics reflecting local ingredients and preferences.
In Eastern Europe, particularly Poland, “kapusta kiszona” closely resembles traditional German sauerkraut but often incorporates caraway seeds and sometimes apples for subtle sweetness. Russian “kvashenaya kapusta“ frequently includes cranberries and carrots alongside cabbage, creating a more complex flavor profile and vibrant appearance.
Korean kimchi, though technically a different preparation, shares fermentation principles with sauerkraut but introduces chili peppers, garlic, ginger, and fish sauce for a spicy, umami-rich result. The fermentation process relies on the same lactic acid bacteria but yields dramatically different flavors.
In France, the Alsace region (with its German influences) features “choucroute,” typically prepared with wine, juniper berries, and various spices. This preparation method creates a more aromatic profile than traditional sauerkraut.
Chinese suan cai, potentially the original ancestor of all fermented cabbage, varies by region but often incorporates rice wine in the fermentation process. In southern China, mustard greens sometimes replace cabbage altogether.
Even within the United States, regional variations have developed. Pennsylvania Dutch sauerkraut frequently includes apples and onions, while some southern preparations add a touch of sugar to balance the sourness.
These global adaptations demonstrate how a simple preservation technique evolves to suit local tastes while maintaining the core benefits of fermentation. Despite their differences, all these variations share the probiotic richness and enhanced nutritional profile that fermentation provides.
Red vs. Green: A Comparison of Two Cabbages
Green cabbage ferments easily with its softer structure, producing tender sauerkraut with mild, classic tang. Red cabbage requires more stomping but offers firmer texture, bolder flavor, and higher nutritional value with its anthocyanins, vitamin C, and iron. Combining both creates visually appealing sauerkraut with balanced texture and flavor, while the diffusing purple color serves as a fermentation indicator.
The Satisfaction and Challenge of Traditional Fermentation
The process of making sauerkraut fully engages all our senses—beginning with the rhythm of the knife, continuing to the sound of stomping the cabbage, then to the changing aromas of fermentation, and ultimately concluding with the complex flavors of the finished product.
Like many traditional foods, kraut-making involves a learning curve. My experiences have included perfectly fermented batches that earned my father’s rare nod of approval, as well as over-fermented disasters that became chicken feed. Each batch teaches something new about the subtle interplay of ingredients, environment, time, and technique.
What I love most is how just cabbage and salt, when left to ferment without oxygen, transform into something much more flavorful and complex, thanks to the work of lactic acid bacteria. As the cabbage ferments, its structure softens, nutrients become easier for the body to absorb, and new beneficial compounds form that weren’t there in the raw cabbage.
Continuing the Tradition
Homemade sauerkraut preserves traditional food practices in today’s industrialized food system. Making your own sauerkraut allows you to create a nutritious food through simple fermentation. The process is straightforward and requires only cabbage, salt, and time.
Try making sauerkraut for its nutritional benefits and distinctive flavor. If your first batch isn’t perfect, learn from the experience and try again. The process improves with practice and observation.
Start your sauerkraut-making journey today. Purchase cabbage from your local farmer’s market or grocery store and follow the steps outlined above. Share your experiences and recipes with friends and family to help preserve this valuable food tradition.