


Last year, I started making vanilla yogurt. For years, decades really, my homemade yogurt was plain, and I would add honey and berries before blending everything in my food processor. But now, I have discovered that flavoring homemade yogurt during the yogurt-making process saves so much time! I just grab a jar from the fridge. I can eat it straight or add fruit or granola.
The Surprising History of Yogurt
Making yogurt at home connects us to one of the earliest food traditions. Someone likely discovered yogurt shortly after families began keeping livestock, when milk naturally fermented in the warm climate of the Middle East. Can you imagine their surprise?
Yogurt has fed countless generations across the globe. Turkish nomads carried it during their travels. Greek families made “oxygala” centuries ago. Even Genghis Khan’s warriors depended on it for strength during conquests.
Some fun historical yogurt facts: India’s Emperor Akbar liked his yogurt with cinnamon and mustard seed (weird combo, right?). Chinese folks have made “nailao”—a rice wine yogurt treat—since the 1800s.
What amazes me most? Despite all our modern technology, we still make yogurt basically the same way our ancestors did. Milk + bacteria + time = yogurt. Simple, delicious, timeless.
Fresh is Best: Why I Make Small Batches
I generally do two quarts at a time. However, I recently read an article that recommended small batches unless you are able to consume it quickly. Yogurt is full of beneficial bacteria. However, the potency of the bacteria grows weaker the longer it sits. Making your own yogurt in small quantities will give you access to the most beneficial gut bacteria possible. Fresh is best.
Homemade yogurt is literally alive with good bacteria! The store-bought stuff goes through so much processing that it kills off a lot of the benefits. Not to mention all those stabilizers and preservatives that are tossed in (just check the label next time you’re shopping – I cannot pronounce half the ingredients). Making healthy yogurt in my kitchen has a comfy feel. What is better than opening the fridge and grabbing a jar of something I made with my own hands?
From Yogurt Maker to Dehydrator: My Equipment Progression
I have used my mother’s family-sized yogurt maker for 25 years. Two years ago, the heating element began to act up. It did not keep the temperature steady and was overheating my yogurt, which kills all that probiotic goodness. I loved the glass jars.
I was considering whether or not to buy another yogurt maker last year. While still deciding what to do, I purchased my first dehydrator. It is a large metal box with removable stainless-steel shelves. I love it! It has a timer and varying temperature settings, and there is an added bonus. I discovered I can also make yogurt in it!
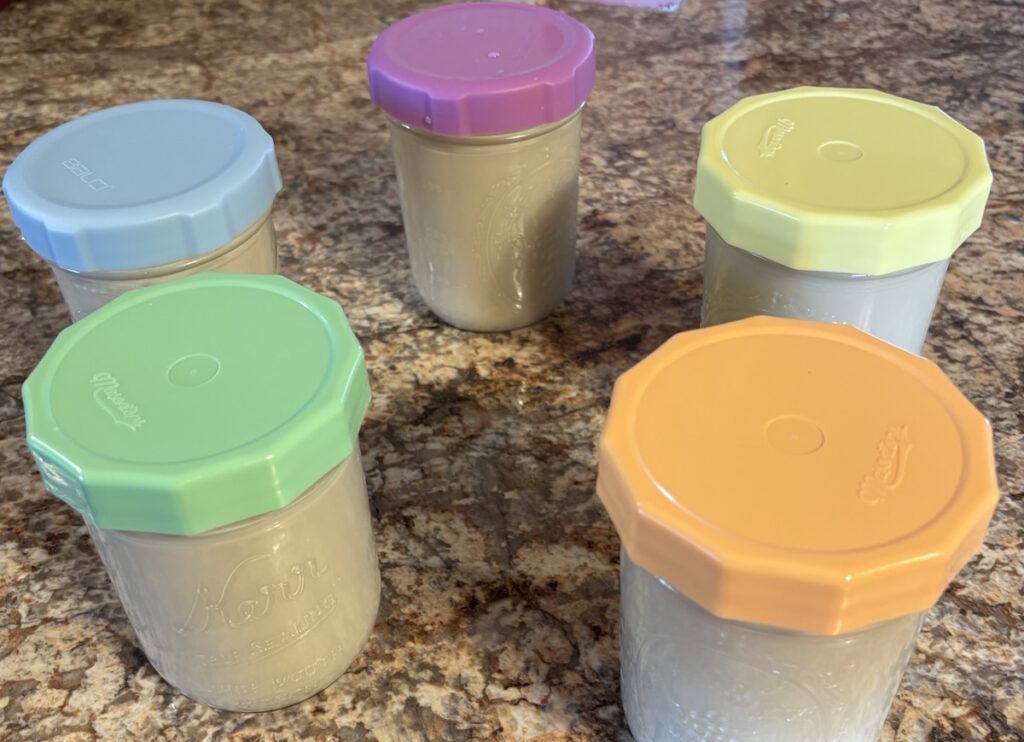
So, I do not need to replace my yogurt maker; I use wide-mouth pint-sized canning jars with colorful lids I have purchased.
This recipe is for 1 quart of milk, but if you have a lot of yogurt lovers in your home, it is easy to double.
What You’ll Need for Homemade Yogurt
Here’s what I pull out when making yogurt:
- Regular stainless pot (nothing fancy)
- Candy thermometer (the one I use for Christmas fudge)
- A whisk (one of my favorite kitchen tools)
- Measuring cups & spoons (plastic ones work best)
- 3 pint jars – I use canning jars, but whatever’s clean works!
- Plastic lids that actually seal tight (learned that lesson the hard way)
- Dehydrator
Do not fret about this list! Most of these items are probably already in your kitchen. The dehydrator’s the only special item, and many homesteaders already have one. It has been one of the best investments I have made. In the past, I used the oven as my dehydrator, but I cannot get the temperature low enough for some foods. I can now use my dehydrator and keep it completely separate from the kitchen, and my oven is still available.
Simple Ingredients for Perfect Vanilla Yogurt
Making yogurt at home is one of the simplest types of cheese you can make. You only need a handful of basic ingredients.
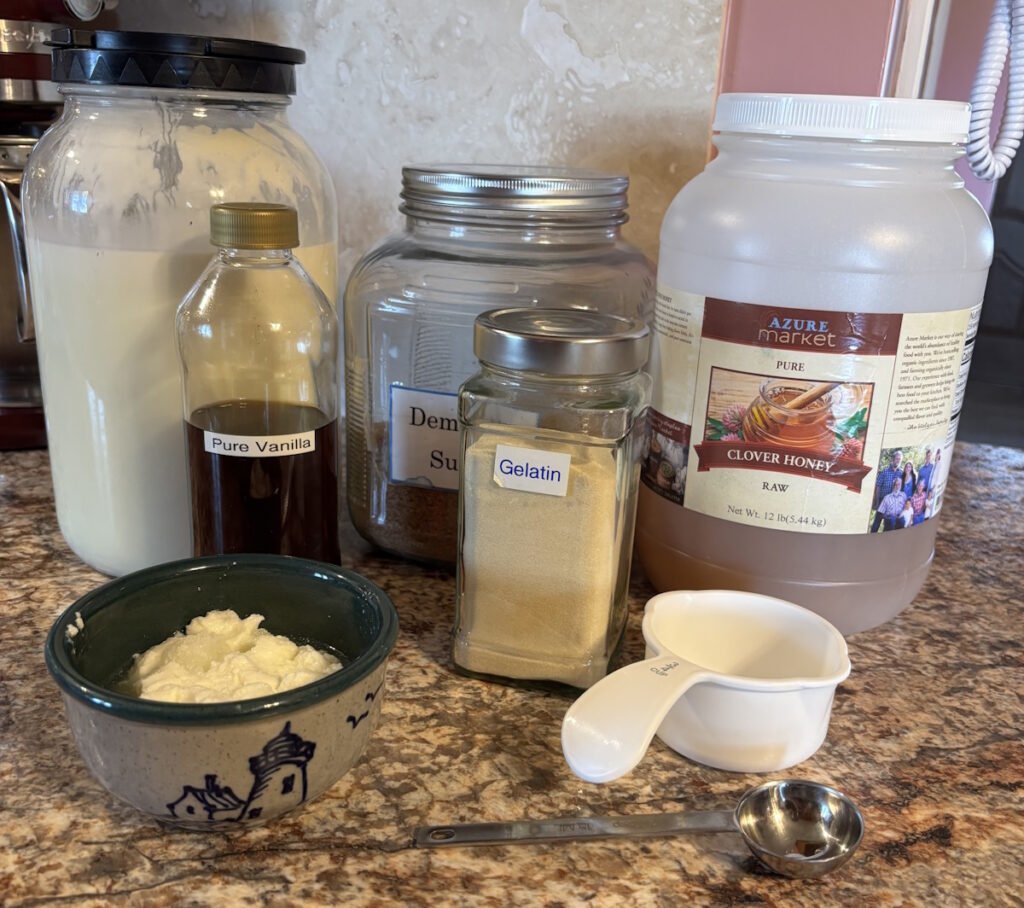
- 4 cups raw milk (I skim off the cream to use for making butter)
- 1 tablespoon unflavored gelatin
- 1 Tablespoon vanilla
- ⅓ cup raw honey or sugar
- ¼ cup plain yogurt (Greek yogurt/Fage works great as a starter.)
The plain yogurt is packed with good bacteria that turn boring milk into tangy yogurt. Pro tip: save a spoonful from each batch to start your next one.
The Great Yogurt Debate: To Scald or Not to Scald?
There are debates as to whether yogurt should be scalded or just heated to 116°F. By scalding, you destroy all the bacteria in the milk, and you add your specific strain of bacteria through the live cultures in your yogurt. Only heating the milk up to 116°F will leave the original good bacteria and also the yogurt culture bacteria, so there may not be as much of the yogurt bacteria because it is competing with the other bacteria. Knowing my gut needs an assortment of bacteria for good health and because I am into the quick, simplistic methods, I choose not to scald my milk and then cool it down. However, it is perfectly fine to scald the milk, and many foodies prefer it that way.
Step-by-Step Process: How to Make Yogurt Without a Yogurt Maker
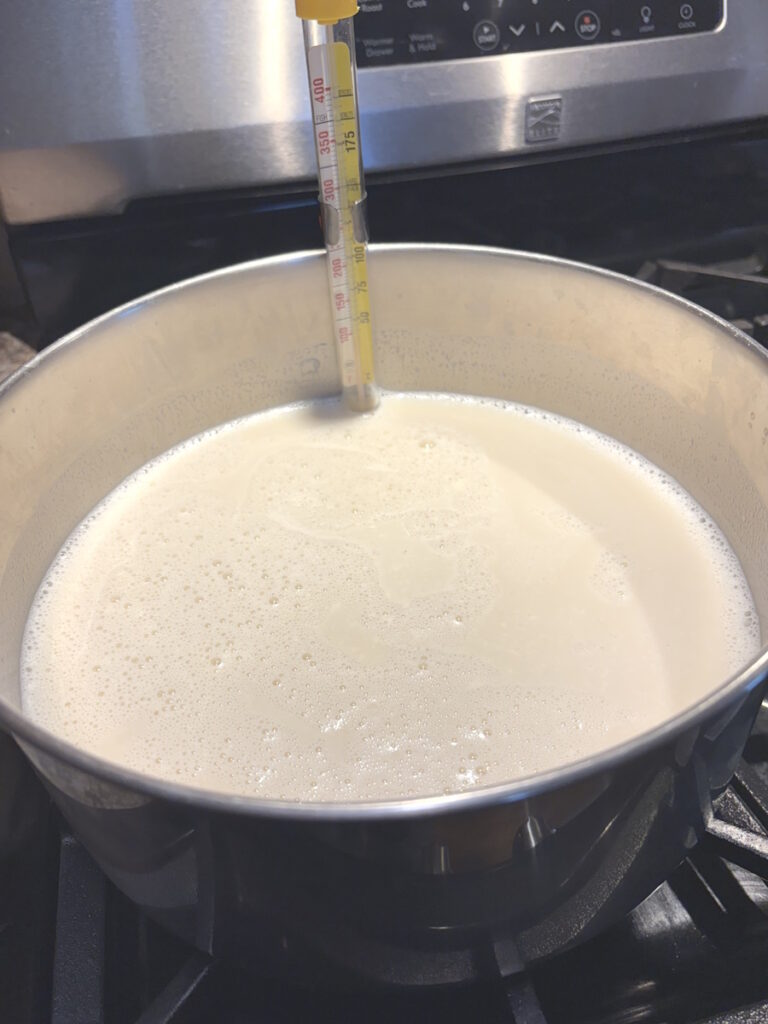
- Place the milk and all ingredients except the yogurt into your pan and stir with the whisk. If you are confident you will not overheat your milk, you could put your yogurt in at this time. However, there have been times I have heated beyond this point, and that would have killed my yogurt. I like extra-thick yogurt, so the unflavored gelatin gives it a nice custard-style without souring.
- Using the thermometer, heat the milk to just 116°F.
- Stir in yogurt thoroughly.
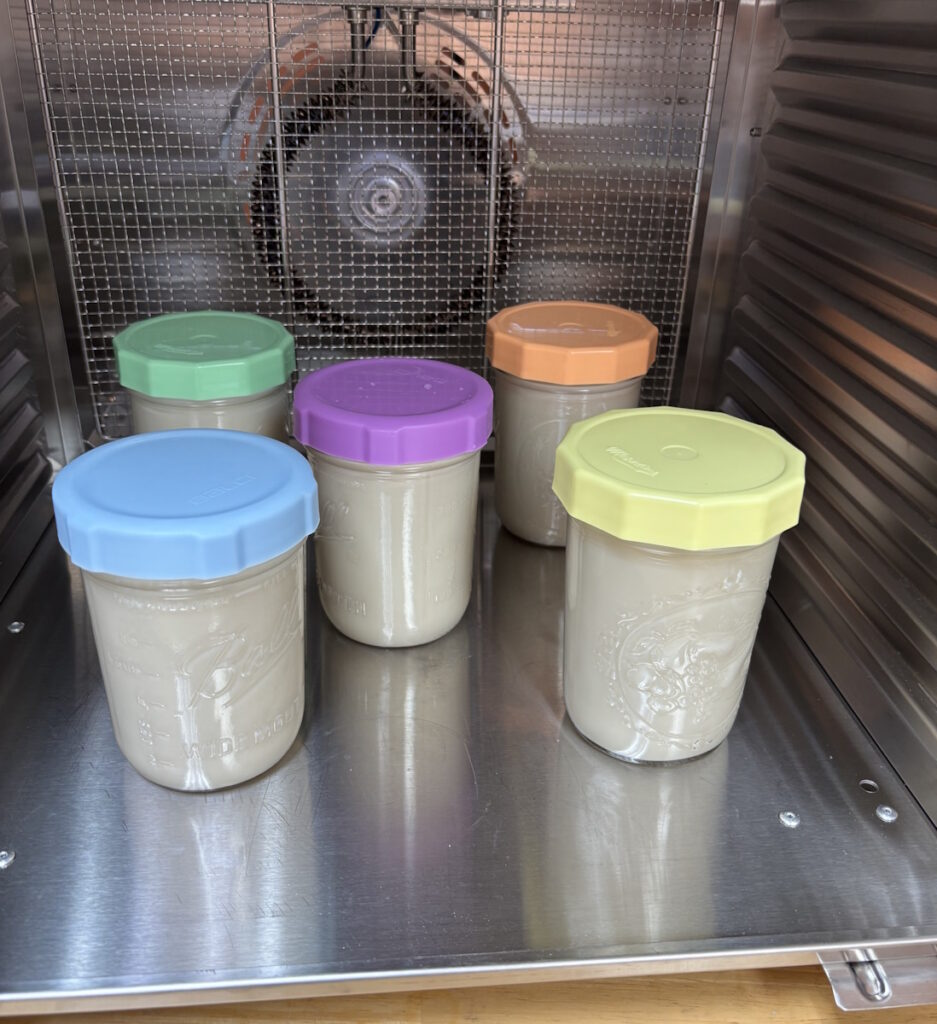
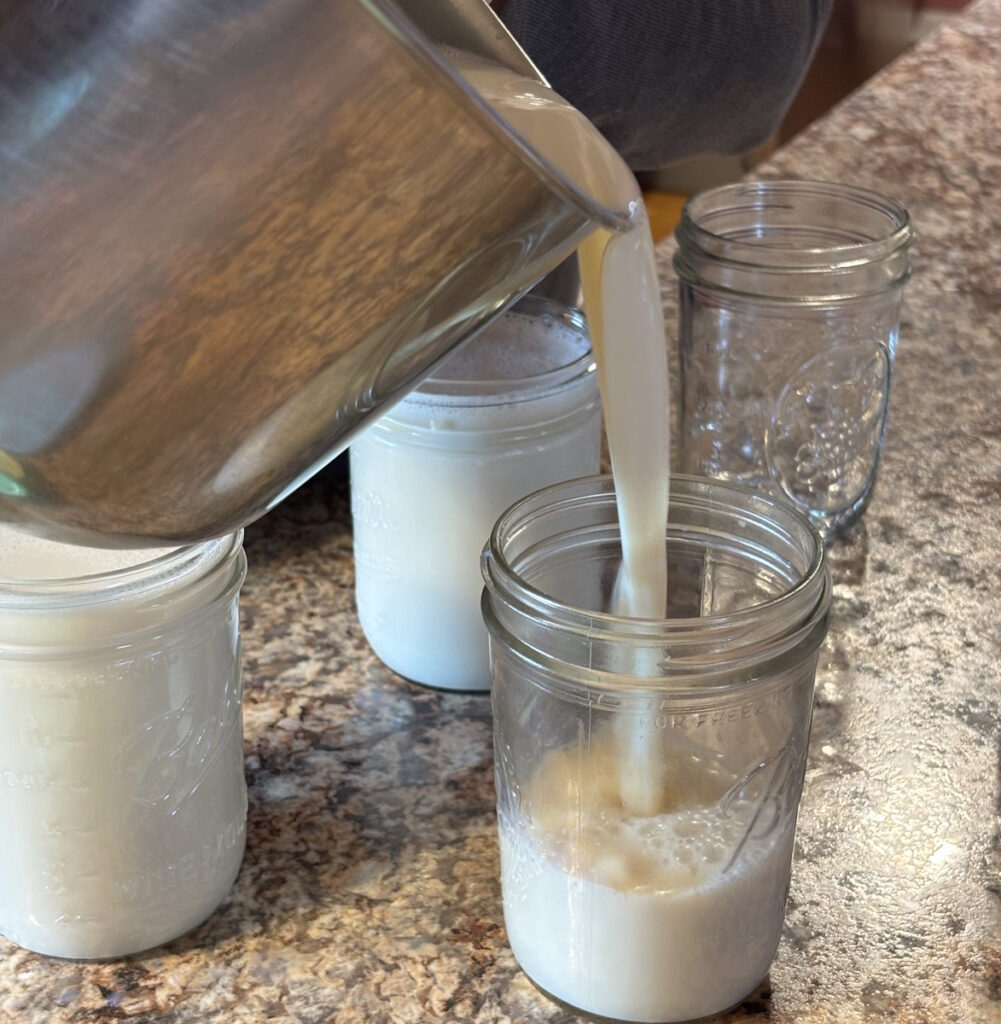
- Pour into clean glass jars.
- Seal with plastic jar lids. Yogurt bacteria can be killed if metal touches it, so use plastic lids. Stainless steel seems to be the exception.
- Place jars into your dehydrator at 116°F for 6-8 hours. I try to keep it to as close to six hours as I can. Lately, I have had to let it sit for 6-1/2 hours. It should be mostly set up, only slightly runny when finished.
- Put it into the refrigerator immediately, and let it sit overnight to finish firming up.
Ways to Eat Your Yogurt
Consume your fresh yogurt:
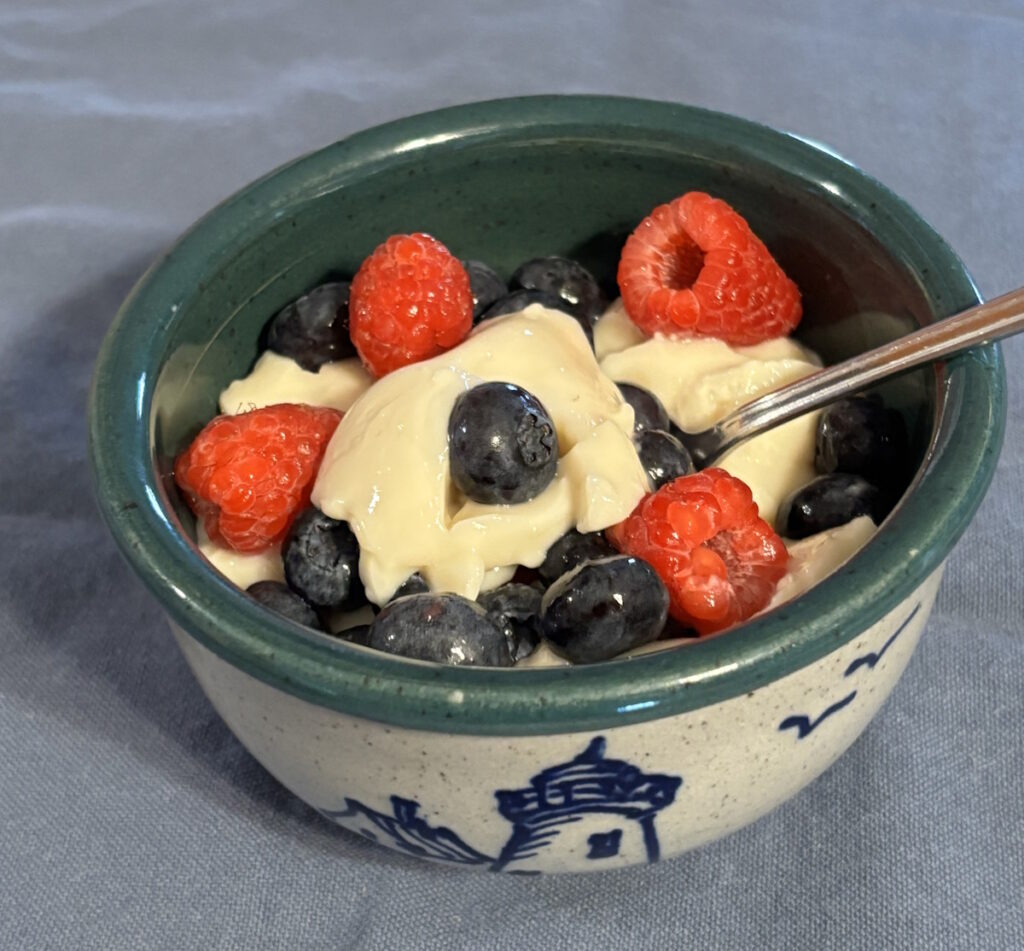
Breakfast: Top with berries and granola
Dessert: Enjoy plain – the vanilla flavor stands on its own
Keep for about 5-7 days in the fridge. Best when fresh.
Health Benefits of Homemade Yogurt
I did research about the amazing health benefits of yogurt since starting my homemade batches. Researchers at Harvard Medical School consistently found yogurt’s live cultures to improve gut health in their 2023 study on probiotic foods.
Store-bought yogurts often contain numerous additives and preservatives. Research from the National Library of Medicine demonstrates that these additives actually counteract some of the benefits of yogurt. My simple homemade version with milk, starter, vanilla, gelatin, and honey keeps all the beneficial bacteria intact.
The protein content in yogurt (about 12g per cup) has been scientifically proven to increase satiety hormones and contain high levels of calcium. The B12 and riboflavin in yogurt support cellular energy production.
Winning Over Picky Eaters
If your children wrinkle their noses at yogurt, don’t force it. Use this vanilla recipe. See their eyes light up! Let them pick their own mix-ins too – even if it’s just jam or honey at first. Eventually they’ll develop a taste for it. Or, put the yogurt in clear glasses with layers of fruit and top it with graham cracker crumbs. Suddenly it becomes a “special breakfast dessert.”
Common Yogurt-Making Issues
I have had yogurt fails over the years. Last month I had a batch of yogurt turn out way more jiggly than I like. Teva loved it, but it is so frustrating!
Runny Yogurt Disasters
The worst is when you expect thick, creamy yogurt and get something that pours like water. This usually happens when:
- The dehydrator temp fluctuates
- It doesn’t sit long enough (I do this all too often!)
- Old batch of yogurt that has been in the fridge much too long
When this happens, you may add an extra teaspoon of gelatin to the next batch you make. Or check the dehydrator with a separate thermometer – to verify the correct temperature Sometimes you may just need to allow the yogurt to incubate overnight instead of the 6 hours I aim for. It can be more sour, but it will also be thicker.
When Yogurt Gets Too Sour
Yogurt will become more sour and firmer the longer it incubates. However, when your yogurt puckers your mouth like a lemon, it has sat too long. Next time, set a timer! I typically like 6 or 6 ½ hours. There is a fine balance between being too sour and not thick enough. And don’t forget – even in the fridge it keeps getting tangier. So try to eat it within 4-5 days.
That Liquid on Top
Don’t panic when you see clear liquid on top of your yogurt! That’s just whey separating, quite common. You can mix it right back in or pour it off if you want thicker yogurt. The gelatin in my recipe helps it to stay thick.
Homemade Beats Store-Bought
Store-bought yogurt? No thanks. Not anymore. After making my own perfect vanilla for a while now, I can’t go back to those little plastic cups.
The taste difference is huge! My homemade is tangy and sweet but not too sour, with just enough sugar and vanilla that my children do not add extra sugar. Plus, I love knowing exactly what’s in it – no thickeners or preservatives with names too difficult to pronounce.
And let’s talk about money. Buying those fancy yogurt cups can add up fast, and many of them do not even have the live cultures, the whole point of eating yogurt.
The homemade yogurt feels better in my stomach. Maybe it’s all in my head, but I believe the probiotics are stronger when they are fresh.
Try It Yourself!
Ready to give homemade yogurt a shot? It is easier than you might think. You probably already have most of what you need in your kitchen.
This weekend, dust off that dehydrator, grab some milk, and just go for it! The first batch of homemade yogurt might not be perfect, but you will get the hang of it quickly.
What still amazes me is watching plain milk transform into something completely different overnight. It’s like a little kitchen alchemy show every time. Nothing will beat the look on your husband’s face when he realizes your homemade yogurt tastes better, is cheaper, and is better for you than the fancy brand he used to buy. Your gut will probably thank you, too, but the taste alone is worth it. Plus, there’s something satisfying about pointing to something in your fridge and saying, “I made that homemade yogurt from scratch!”