

The other day I was visiting with a friend. I mentioned that I was preparing to set out my fall table centerpieces. She mentioned that she would not have any idea of where to start. Thus, it inspired me to write this comprehensive guide.
For years, I wanted to have some kind of centerpiece. In our old house, we had a buffet cupboard with a few knick-knacks. I began by simply using a couple of cloth napkins and centering them on opposite points so that I had a total of eight points instead of four corners and placing a couple of nice items from the shelf on the table to make it “pretty.” Four years ago, when we moved to our new place, I was determined to have a centerpiece for every season and holiday I liked to celebrate.
Understanding the Art of Table Centerpieces
Before diving into the practical steps, it is helpful to understand what makes a centerpiece truly effective. According to interior design principles, a successful centerpiece should complement your dining space rather than dominate it. The human eye naturally seeks balance and harmony, which is why the most pleasing arrangements incorporate elements of varying heights, textures, and colors.
Interestingly, the tradition of table centerpieces dates back to ancient civilizations. Romans would create elaborate displays of fruit and flowers to honor their gods during feasts. The Victorian era introduced the concept of seasonal centerpieces, with elaborate arrangements changing throughout the year to reflect nature’s cycles—a tradition I have enthusiastically embraced in my own home.
Getting Started: Choosing Your Theme and Base
First, I decide what season or holiday I want to start with, like autumn, Fourth of July, or Christmas. Once I know what theme I am wanting to decorate for, I like to go to a store to get some ideas. Hobby Lobby has really good seasonal aisles, but there are many stores that work great: Dollar General, Target, and Walmart, to name a few.
Finding Budget-Friendly Table Centerpiece Ideas
One of the most common misconceptions about creating beautiful centerpieces is that they must be expensive. This could not be further from the truth. Some of my most successful arrangements have been assembled entirely from thrift store finds, items I already owned, and natural elements gathered from outdoors. If you are interested in simplifying your approach to home design overall, you might enjoy reading about the art of minimalism and how it can transform your living spaces.
When shopping at budget-friendly stores, look beyond the intended use of items. That glass vase might serve better as a candle holder. Those inexpensive napkins could become the perfect base for your arrangement.
What to Use for a Table Centerpiece Base
Once at the store, I look for my base—what do I want my centerpiece to sit on once it is completed? Some people may use the same base for all their centerpieces. I like to use placemats, napkins, or hand towels for my base. They can be easily changed out, they take very little storage space, and they enhance and change the overall look.
The choice of base significantly impacts the final presentation. Placemats provide structure and define the centerpiece space clearly. They work particularly well on large dining tables where you need to establish boundaries. Napkins are more flexible than placemats and can be folded, layered, or arranged in creative ways. I have discovered that using two napkins at diagonal angles creates an eight-pointed star effect that adds dimension to even simple arrangements. Hand towels provide more surface area and often feature beautiful patterns and textures. Tea towels with seasonal motifs can essentially serve a dual purpose—as both a base and a thematic element.
Essential Elements of Effective Centerpiece Design
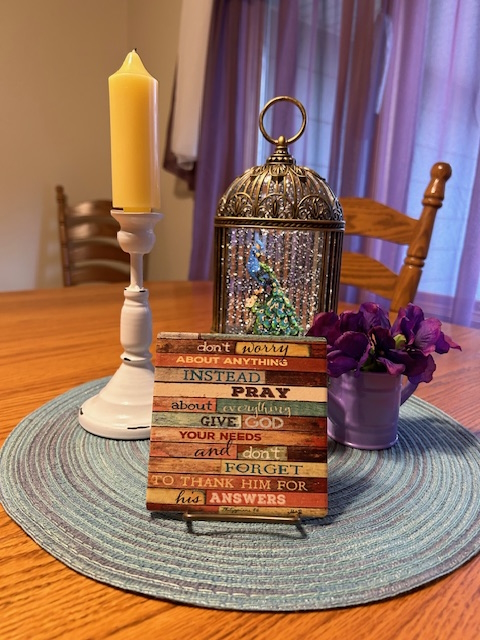
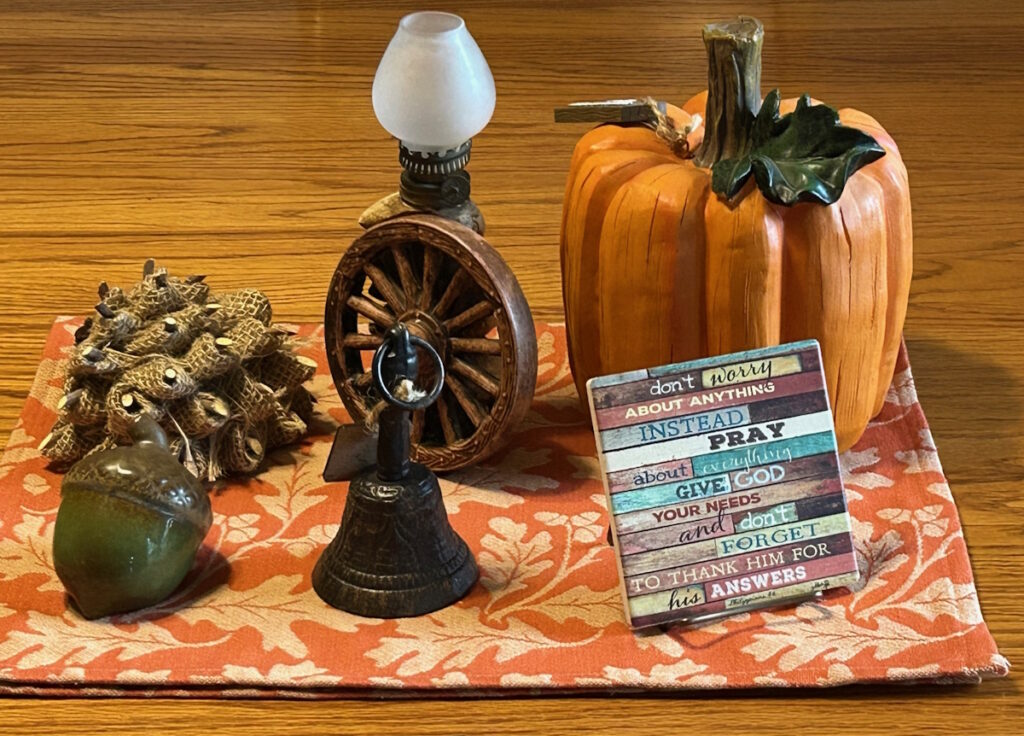
Some of the features I like to incorporate in my table centerpieces are to use one nice, large wooden, ceramic, glass, or metal object, a candle or light source, an inspiring message, and something unexpected or fun. Take into consideration the use of different heights and textures.
The Importance of Height Variation
One principle that transformed my centerpiece creation was understanding the “rule of three” in design. This principle suggests that arrangements are most visually appealing when they incorporate three different height levels. For example, an autumn centerpiece might include a low-level base of colorful leaves, medium-level small pumpkins or gourds, and high-level tall candles or a vase with branches. This variation creates visual interest and prevents the arrangement from appearing flat.
Incorporating Candles and Light
Lighting plays a crucial role in creating ambiance. I have learned an interesting trick about candle colors: I purchase multiple candles of the same style but in different colors. I do not typically light the candles, but I like how they look and add height to my displays. This approach allows me to adapt the same basic candle holders to different seasonal themes simply by swapping the candle colors.
Did you know that candles have been used as centerpiece elements for over 400 years? The tradition began in European manor houses, where candlelight was essential for evening meals.
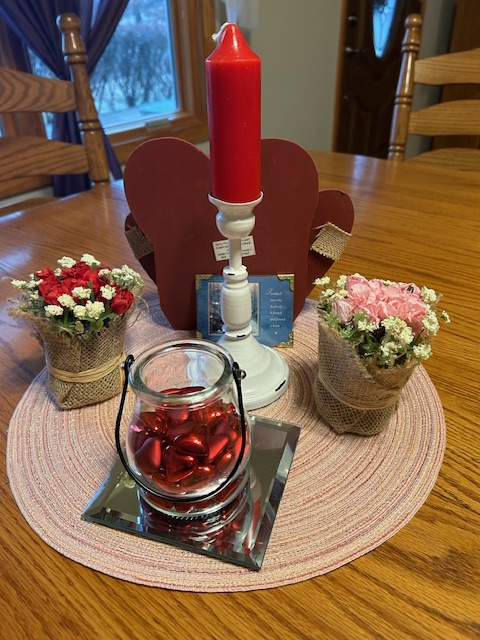
Another way to add light and depth is to use a flat mirror beneath a glass object. This technique is often used at wedding or shower receptions.
How to Make a Table Centerpiece: Step-by-Step Process
Once you start seeing things and getting ideas, it is easy to end up with a basketful. However, only a handful of items will fit on the centerpiece. It is meant to bring inspiration, joy, and peace, not cause overwhelm or confusion.
I have actually found a quiet corner in the store and laid out what I am envisioning. I have had to put things back on the shelf, but that is good because overall, your centerpieces should be inexpensive, fun to create, and beautify your home.
Here is my systematic approach to centerpiece planning:
- Select your anchor piece first: This is your largest, most substantial item—perhaps a decorative bowl, a large candleholder, or an interesting wooden object.
- Add height elements: Choose 2-3 items that add vertical interest—candles, vases, metal sculptures, wooden objects, or other tall, decorative objects.
- Include mid-range elements: Select several items that fill the middle space—small decorative objects, medium-sized natural elements, or thematic pieces.
- Consider low-level elements: These might include small scattered items, a base layer of leaves or fabric, or low bowls filled with seasonal items. I also like to use pebble-like items: glass, small valentines, and polished rocks.
- Plan your focal point: Every arrangement needs something that draws the eye—perhaps a particularly beautiful object, an inspirational message, or an unexpected element.
Assembly and Refinement
Once I am home, I clip tags and start assembling. This is my favorite part. Sometimes I play around with rearranging or trying different elements.
Here are specific techniques I have developed:
The Triangle Method: Arrange your three tallest elements in a triangle formation rather than a straight line. This creates visual interest from every angle.
The Odd Number Rule: Use odd numbers of similar items (3 small pumpkins rather than 4, 5 pinecones instead of 6). Our brains find odd-numbered groupings more visually appealing.
The Layering Technique: Do not be afraid to overlap elements or create depth by placing some items slightly behind others.
The Negative Space Principle: Resist the urge to fill every space. Empty areas allow the eye to rest and actually make the filled areas more prominent. Understanding negative space can transform your arrangements.
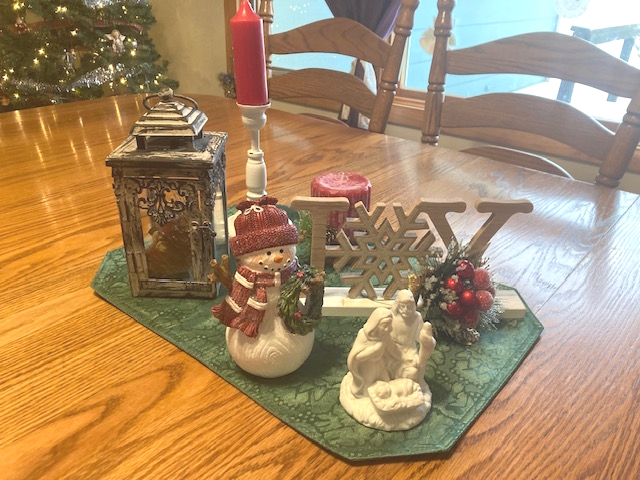
Table Centerpiece Ideas Without Flowers
While fresh flowers create stunning displays, they require frequent replacement and can strain a budget. I have developed numerous non-floral approaches that offer equal beauty with greater longevity.
Natural Elements from Your Homestead
Living on a homestead provides endless centerpiece materials. Here are some idea starters: dried Indian corn, gourds, small pumpkins, pinecones, interesting branches, wild flowers, seed pods, and even carefully selected rocks. These elements cost nothing and connect your indoor space to the outdoor landscape. If you are curious about starting your own homestead journey, I’ve written about homestead gardening and how it can provide beautiful, natural elements for your home.
Autumn offers particular abundance. The variety of pumpkin and gourd colors—from deep orange to pale cream, spotted to striped—provides natural artistry. Winter brings opportunities to use evergreen branches, pinecones, and berries. Spring and summer present chances to showcase growing herbs, potted plants, or even freshly harvested vegetables arranged artistically.
Centerpiece Ideas Without Buying
Look around your house and see what you may already have. A vase, a decoration, some candlesticks, a small inspiring picture, and a glass frame. I have even been known to use dried Indian corn, gourds, and small pumpkins. Maybe a unique wooden or crystal bowl with fruit?
You can successfully create centerpieces using vintage books stacked to create height, Mason jars filled with colored beans or rice with candles nestled on top, wooden cutting boards as bases styled with seasonal elements, decorative bowls filled with ornaments during the holidays, and picture frames containing inspirational quotes propped among seasonal elements.
Creating Easy DIY Centerpiece Ideas for Every Season
The beauty of developing a year-round approach to centerpieces is that you build a collection over time. My storage system now contains themed sets for spring, summer, fall, winter, Christmas, Easter, Fourth of July, and Thanksgiving.
DIY Fall Centerpiece Ideas
Autumn is my favorite season for centerpiece creation. The rich colors, abundant natural materials, and numerous holidays provide endless inspiration. Much like my garden perspective, where I find beauty in each season’s offerings, fall centerpieces allow me to celebrate the harvest season right at my dining table.
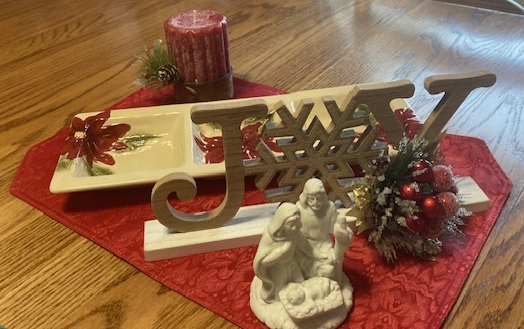
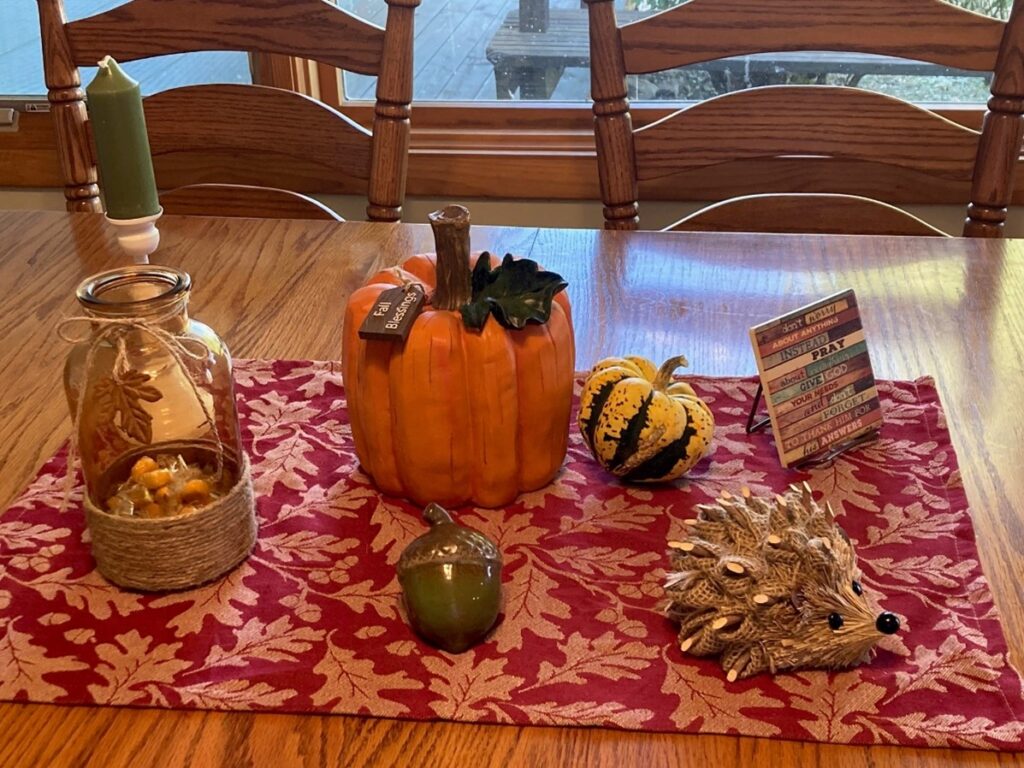
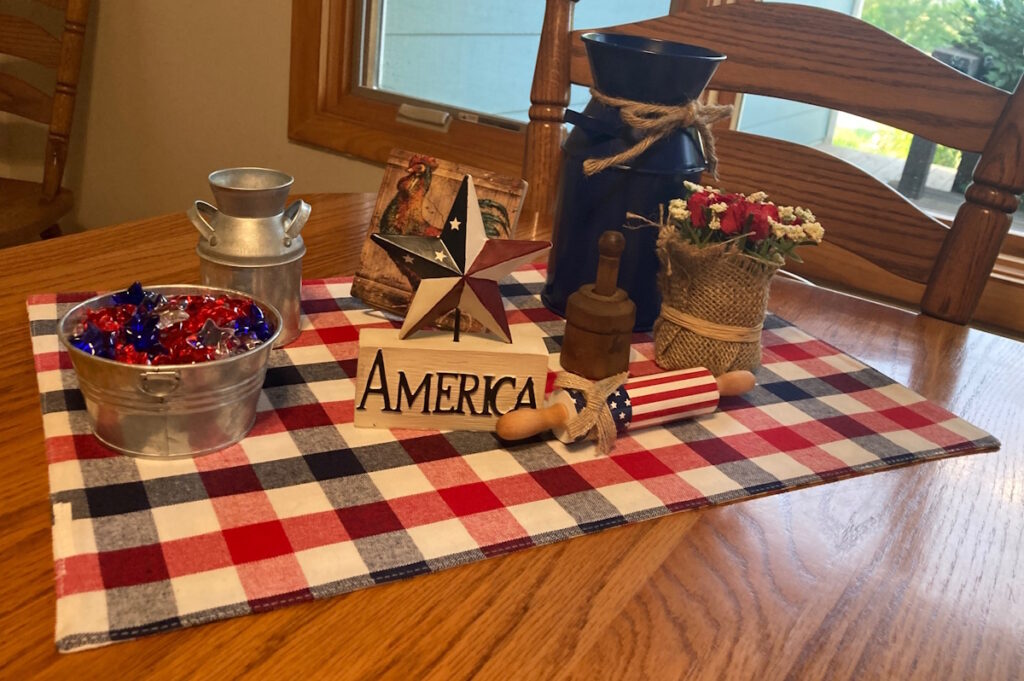
Try this: combine a plaid or burgundy placemat base, small pumpkins and gourds in various colors (3-5 pieces), tall amber or burgundy candles (3 candles of varying heights), dried corn or wheat stalks for height, scattered autumn leaves around the base, and a small wooden sign with an inspirational fall message.
The total cost for this arrangement, assembled from Dollar General and natural elements from the homestead, is approximately eight dollars. It lasts the entire autumn season.
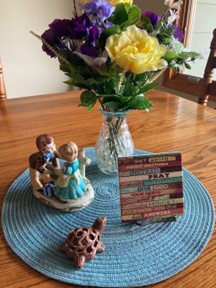
Spring and Summer Centerpiece Ideas
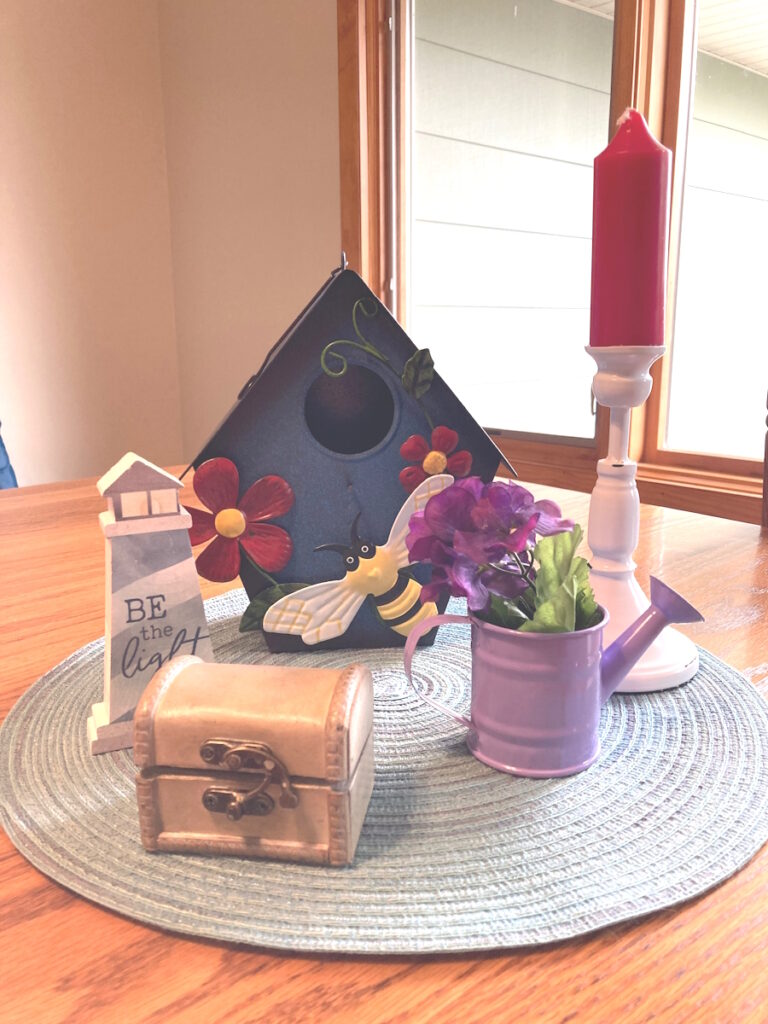
Spring calls for lighter, fresher arrangements. Transition to pastel-colored napkins as the base, fresh potted herbs (basil, rosemary, or mint), white or pale-yellow candles, small bird nests or decorative eggs, and light-colored ribbons or fabric accents.
Summer centerpieces can embrace brighter, bolder elements: brightly colored placemats (coral, turquoise, or sunny yellow), fresh lemons or limes in clear glass bowls, white candles for contrast, seashells or beach-themed elements, and small potted succulents or air plants.
The Critical Importance of Photographing Table Arrangements
Once I am satisfied with how I have my centerpiece, I have started doing one last important step. Take a picture! I have had several settings I put together I really loved but neglected to take a picture. I sadly cannot recall how I had placed everything.
Photographs provide an exact record of successful arrangements. When I retrieve my storage container next year, the photo instantly reminds me of the placement, color balance, and specific elements used. This is similar to how I document homestead memories—capturing moments so we can revisit and learn from them later.
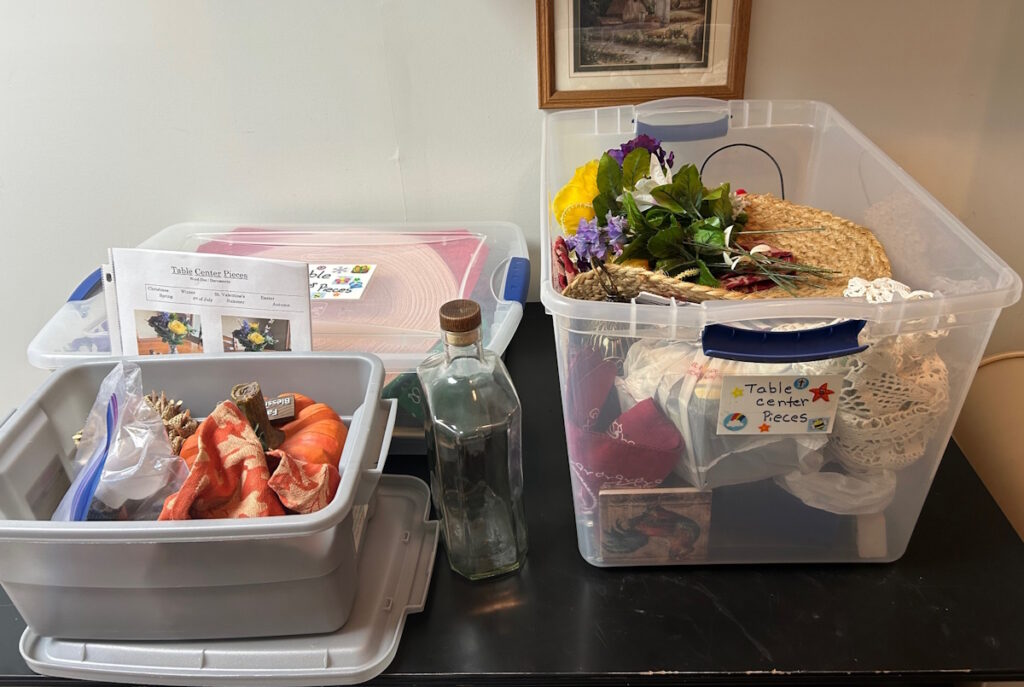
Storing Seasonal Centerpieces: Essential Organization
Storage. Once the season or holiday is over, carefully store it in a tote. Keep your table arrangement photos in the box alongside your pieces so you can easily remember what you did previously. An entire year passes, and I have a difficult time remembering what that beautiful arrangement I created a year ago looked like.
Practical Storage Solutions
Developing an effective storage system initially can be challenging. Establish a practical system that works for you. Outlined here is a basic, efficient system. If you’re working on organizing your entire home, you might find my guide on home organization helpful—many of the same principles apply to storing seasonal decorations.
Container Selection: Clear, stackable, plastic storage containers are essential. Being able to see contents without opening every box saves considerable time. I use standard-sized containers that stack efficiently in your storage area. If they are too large, they become heavy and awkward to maneuver.
Protective Wrapping: Fragile items receive individual protection. Try saving tissue paper from purchases throughout the year. Bubble wrap provides protection for particularly delicate glass or ceramic pieces.
Photo Documentation: Print a photo from each table design and tape it to the exterior of the storage container or slip it inside. This allows you to identify contents instantly. Consider keeping a digital backup copy also.
Labeling System: Clear, detailed labels on each container allow for quick retrieval.
Protection from Pests
Natural elements attract mice and insects. Over time, they can also deteriorate. I learned this lesson the hard way. Now I store anything potentially attractive to pests in sealed bags within the plastic containers with secure lids.
Common Table Centerpiece Mistakes to Avoid
Here are some common mistakes to avoid in creating your centerpieces and hopefully save you from future frustrations.
Dominance: Too large of a table setting can interfere with conversation. Follow this guideline: centerpieces should occupy no more than one-third of the table’s surface area and should never exceed 12-14 inches in height if the table is used for dining.
Color Overload: Limit arrangements to 2-3 main colors plus neutrals to create a more pleasing result.
Practicality: Sometimes centerpieces can include elements that present practical problems. Tall, unstable arrangements can easily be knocked over. Items with loose components (like decorative beads) can scatter if someone bumps the table. Consider both beauty and practicality.
View All Angles: Our table is situated in a main walkway, so I like to have some object facing each of the three angles we see when walking past. This consideration is crucial yet often overlooked. An arrangement that looks beautiful from the kitchen entrance might appear sparse from other viewing angles.
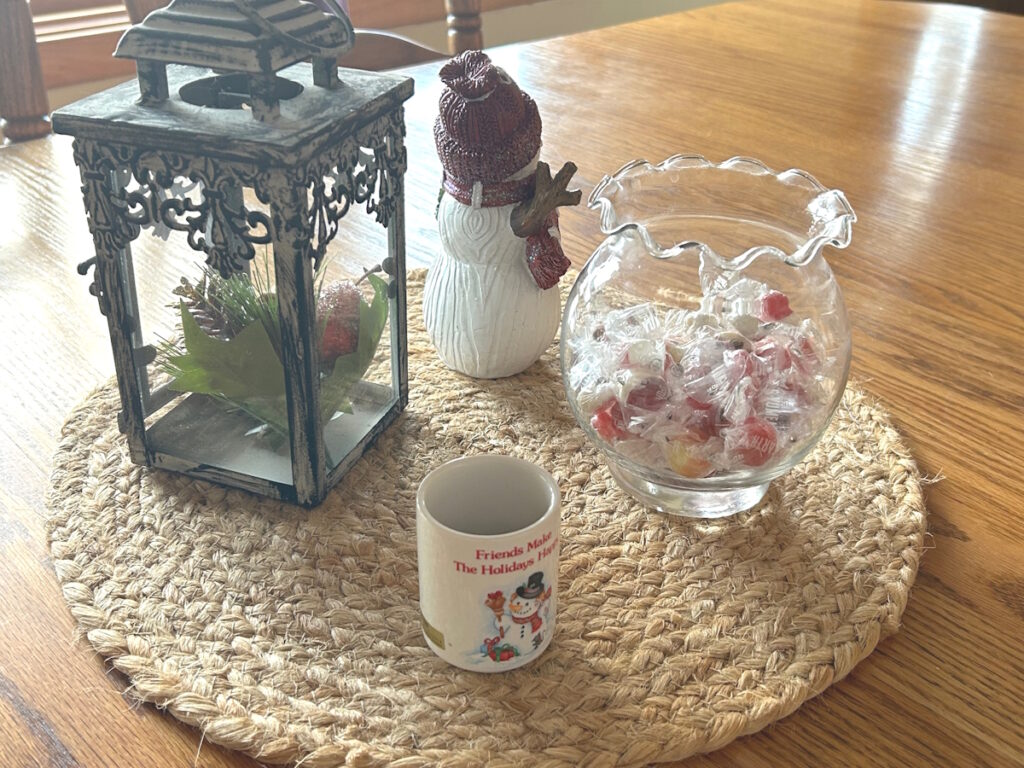
Candy Dish Centerpieces
Another idea is having a little candy dish. Sometimes I will keep chocolates for Christmas or Saint Valentine’s Day and hard-wrapped candies for autumn.
This simple addition has provided unexpected pleasure. The candy dish serves multiple purposes: it adds visual interest with colorful contents, provides an interactive element, and offers a small treat that enhances the dining experience.
Getting Started: Your First Centerpiece
I hope this article has given you insight and inspiration to start your own table centerpieces. If you are ready to begin, here is my recommended plan:
- Choose your season: Select the season or holiday that appeals the most to you right now, like whatever is coming up.
- Shop your home first: Spend 20 minutes gathering items you already own that might work. If you need to declutter first, my kitchen decluttering guide can help you identify items you might repurpose for centerpieces.
- Plan a modest shopping trip: Visit one store with a $10-25 budget.
- Select 5-7 items: Choose one base, 1-2 candleholders or candles, 2-3 seasonal accent items, and 1-2 filler elements.
- Arrange without pressure: Give yourself permission to play and experiment. One other note I want to make. Sometimes I need to expand or shrink my table. So, my centerpiece often comes off the table and is displayed on the piano in the same room. Therefore, I like to have items that can quickly and easily be picked up and rearranged instead of an elaborate leaf or petal presentation.
- Take photographs: Document your first creation, even if you think it is simple.
- Live with it: Enjoy your centerpiece, and if an idea comes up to add or tweak slightly, do it. Just don’t get caught up in the perfection trap. Enjoy what you have accomplished. Every time you see it, embrace the feelings of gratefulness, pleasure, and satisfaction.
- Reusing objects: You may find different pieces work in more than one arrangement or you want to vary your arrangment the next time. Both are great ideas and give fresh vision to old items. Don’t forget to snap a picture!
- Build gradually: Your collection will develop, one season/holiday at a time. Within a year, you will have a complete arsenal.
Unexpected Joy
To involve your children, use centerpieces for family project craft night. It is a fun way to engage their imaginations. Add a short history lesson for whatever season or holiday you are showcasing for the homeschoolers. Your littles will love this new teaching style.
Do I always follow the rules outlined above? Absolutely not! Often I have an even number of objects. My current centerpiece actually uses 6 items instead of 5. However, I liked the school bell just as much as the ceramic acorn, and they were different heights, so I used both. The important thing to remember is that you are contributing meaning and joy to your homelife in a subtle but effective way.
The dining table is where many families gather daily. Making this space beautiful—even in small, simple ways—honors both the space and the people who gather there.