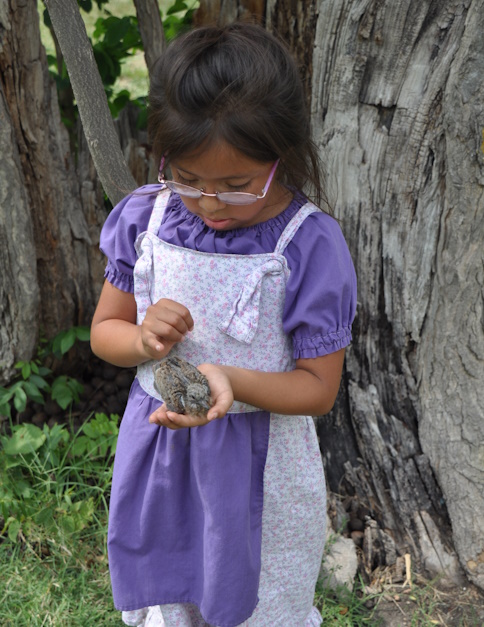


Though I haven’t sewn much lately, I love sewing. Years ago, with my trusty sewing kit by my side, I made countless dresses and outfits for my daughter, Teva. Watching her twirl in those handmade creations filled my heart with joy.
In this article, I want to share my journey and the basics of sewing—from creating children’s outfits to crafting quick, meaningful gifts. I’ll guide beginners and those returning to sewing through essential techniques, my favorite projects, and the simple pleasure of creating something beautiful with your own hands.
Sewing is more than just making clothes or home décor—it’s a sanctuary. When I sit at my machine, time slows down. The rhythmic sound of the machine brings a sense of peace. This craft has taught me patience and precision, and sometimes I discover my lack of both!
In a world dominated by blaring screens, sewing offers a refreshing escape—something tangible and fulfilling. The satisfaction of completing a project, whether a simple burp cloth or a flowing dress, brings a sense of accomplishment that no digital game can match.
Getting Started: My Essential Sewing Kit and Tips
Like many women my age, I took a home economics sewing class in high school. From the start, Mom made certain that I had a good sewing kit, embracing minimalism with only the essential tools. She got me a pair of scissors that would last a lifetime. She did not even own such a fine tool, but she wanted me to start off on the right foot. We even had my initials engraved on them. The heart of any sewing space is, of course, the sewing machine. A beginner doesn’t need a fancy model with hundreds of stitches—a reliable machine with straight stitch, zigzag, and buttonhole capabilities is perfect. My first machine was my great-aunt’s Singer.
Beyond the machine, my most treasured tool, of course, is a quality pair of fabric scissors. I keep mine strictly for fabric cutting, ensuring their sharp edge remains intact. Other tools include a reliable measuring tape, small metal ruler, magnetic pin cushion, and fabric marking tools, as well as a good seam ripper. Yes, we all need one; mine tries to claim the title “Best Friend”!
Organization makes sewing more enjoyable. I use interchangeable stackable bins or drawers that are labeled: buttons, needles, markers, pens, elastic, fabric scraps, etc. Having everything in its place makes starting a new project easier and more inspiring.
Enhancing Your Sewing Kit: Fabric Selection Guide
Selecting appropriate fabric is important, especially for children’s clothing. Multiple factors beyond appearance should guide fabric selection, as different projects require different materials. A well-stocked sewing kit should include fabric swatches to help with selection. For everyday wear, cotton poplin offers durability, breathability, and ease of use. Jersey knits work well for lounge wear, while pajamas and soft burp cloths are best with flannel. Special occasions may call for cotton sateen to achieve an elegant look. My favorite fabric is cotton because it is so easy to work with and can be used in many different ways.
Proper fabric preparation helps prevent issues like shrinkage or color bleeding. Pre-washing fabric, followed by pressing while slightly damp, removes wrinkles and ensures accurate cutting. This preparation process contributes significantly to the quality of the finished garment. Please note that some fabrics, like silk dupioni, must be dry cleaned and never washed, while other fabrics like wool and velvet should not be ironed. Carefully read the fabric care instructions for the best results with your specific fabric.
Essential Sewing Techniques
Mastering basic techniques is the foundation of beautiful sewing. The straight stitch is used for almost everything, from joining seams to creating delicate hems. Even the most basic sewing kit should include different needle sizes for various stitch types. Adjusting stitch length makes a big difference—longer stitches for basting and gathering, shorter ones for strong, secure seams.
The zigzag stitch opened up new possibilities, preventing fraying, especially for frequently washed children’s clothes. Adjusting its width and length allows for various effects, such as stretch seams for knits. Mastering buttonholes can be a journey in itself. However, the outfits I sewed for Teva had very few buttonholes. I always like to do a practice one or two to make sure I have the correct length, and it is going to look right. The key is marking them accurately and testing the size with the button before sewing.
Simple Projects That Bring Joy
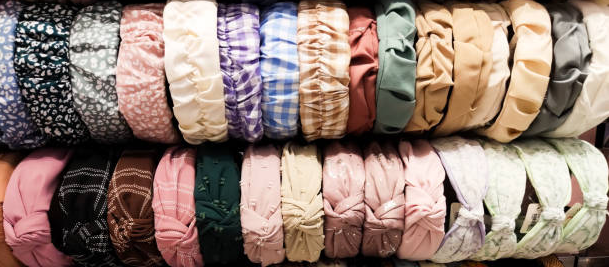
Delightful Quick Headbands
Headbands were Teva’s favorite accessory growing up, and making them became our special mother-daughter activity. We would spend afternoons choosing fabrics and creating matching sets for her outfits. The process is simple, but the results are charming. This pattern is a cuter version of the one we made.
Materials Needed:
- Fabric strips (4″ wide x 18″ long)
- 1/4″ elastic (optional)
- Matching thread
- Safety pin for turning
Step-by-Step Instructions:
- Cut fabric to size (adjust length for head size)
- Fold lengthwise, right sides together
- Sew long edge with 1/4″ seam allowance
- Turn right side out using safety pin
- Press flat
- Choose finishing method:
- Add elastic for stretch
- Create ties at the ends
- Sew ends together for continuous band
The best part about making headbands is how quickly they come together. It was fun to surprise her with new accessories to match her outfits. Different fabrics create different looks—cotton for everyday wear, velvet for special occasions, and stretchy knits for sports activities.
Creating Children’s Clothing
The Joy of Making Dresses
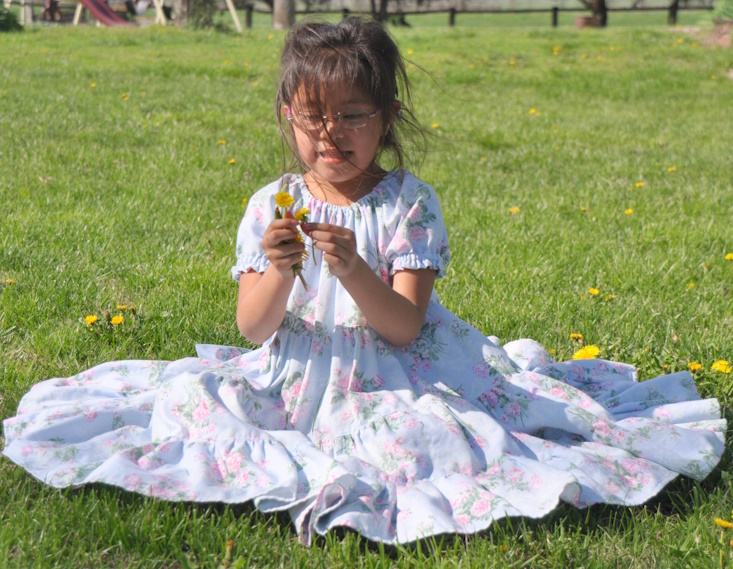
Involve your little princess in choosing the pattern and fabric, and they will want to wear them even more. With a well-equipped sewing kit, you’ll be ready for any custom design requests. Teva’s favorite dress style had a twirly skirt and simple, comfortable bodice with elastic sleeves. The pillowcase dress is an excellent starter project for summer, allowing for endless creativity in fabric choices and embellishments. Successful dressmaking relies on accurate measurements and proper fabric preparation.
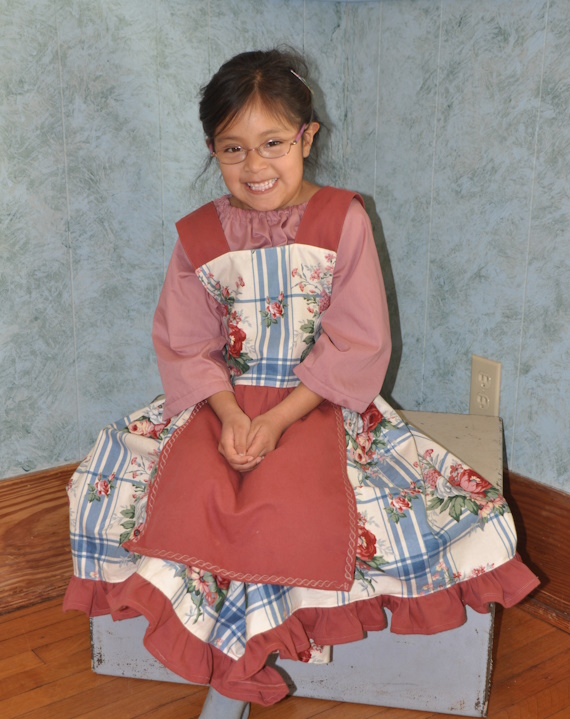
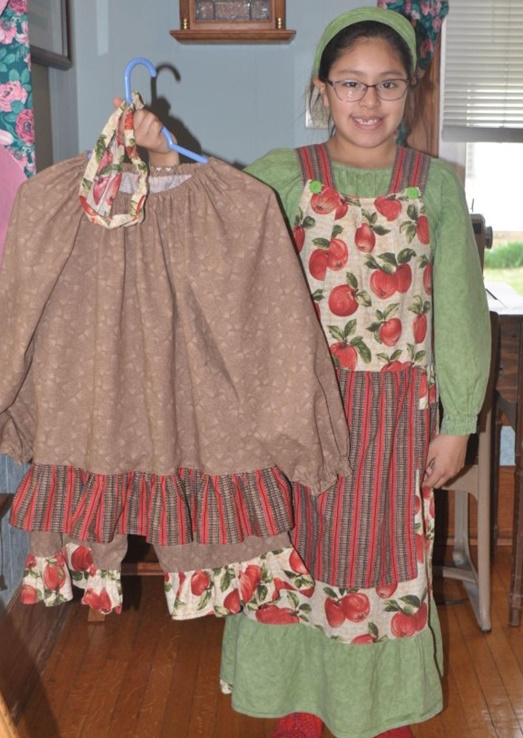
For special occasions or themed outfits, consider coordinated pieces that mix complementary fabrics. An apron-style dress can beautifully combine prints and solids—for example, pairing a novelty print like apples with coordinating stripes and a solid underlayer. Layered looks allow for creative fabric mixing while maintaining comfort and practicality.
Adding details like ruffles or contrast bands at the hem enhances the outfit. The beauty of home sewing is the ability to create coordinating pieces that form a complete ensemble.
Practical Everyday Dresses
When Teva was around 5 years old, I discovered the joy of making dresses that were both pretty and practical. Those years taught me how to balance style with comfort. We would choose complementary fabrics together—pairing festive floral prints with solids that made her eyes light up. Now that she’s 18, photos of her childhood dresses bring back wonderful memories.
The designs prioritized comfort and style. Puff-sleeved dresses with gathered skirts allowed her room to move and play. Each bodice was simply fitted—comfortable enough for home yet still looking proper for trips to town. I add ruffled pants or shorts underneath her dresses to give her more freedom to romp and play.
Some practical lessons from sewing for young ones that still apply today:
- Choose durable, washable cotton fabrics
- Include generous hem allowances
- Reinforce high-stress seams
- Use simple, child-friendly closures (elastic whenever possible)
- Select coordinating prints and colors for a designer look
Though these dresses are now cherished memories, they represent special moments of choosing fabrics together and the excitement of first try-ons. While she has grown into her own style, those early sewing projects helped build a mother-daughter bond that continues today.
Pillowcase Dress: A Simple, Sweet Summer Project
Materials Needed
- One standard pillowcase (or 1 yard of 44″ wide cotton fabric)
- 2 yards of 1/2″ double-fold bias tape or ribbon for ties
- Coordinating thread
- Basic sewing supplies (scissors, pins, measuring tape, sewing machine)
- Safety pin for threading ribbon
- Iron and ironing board
Time Required
- 2-3 hours for beginners
- 45-60 minutes for experienced sewers
Instructions
Prepare Your Pillowcase
- If using a pillowcase:
- Remove any lace or trim
- Cut off the sewn/enclosed end (keeping the hemmed end for the bottom of dress)
- Press out any creases with your iron
- If using the fabric option:
- Cut a rectangle 22″ wide by desired length (measure from child’s armpit to desired hem length, then add 3″ for casing)
- Hem bottom edge by folding up 1/4″, then another 1/4″ and stitching
Create the Armhole Curves
- Fold pillowcase in half lengthwise, right sides together
- At the top, measure down 5″ from fold and mark
- From side edge, measure in 3″ and mark
- Draw a gentle curve connecting these points (use a bowl or plate as a template)
- Cut along curve through both layers
- Repeat for other side
Make the Ribbon Casing
- At top edge, press down 1/4″ toward wrong side
- Press down another 1″ to create casing
- Pin in place
- Stitch close to bottom folded edge, leaving a small opening at side seams for ribbon
Finish the Armholes
- Cut bias tape into two equal lengths
- Pin bias tape around armhole curves, encasing raw edges
- Stitch in place, being careful around curves
- Trim any excess bias tape
Add the Ties
- Cut ribbon into two 27″ pieces
- Using safety pin, thread ribbon through front casing from right side
- Thread second ribbon through back casing from left side
- Tie ends of ribbons together at each shoulder
Final Touches
- Press all seams for a crisp finish
- Try on dress and adjust ribbon length as needed
- Tie bows at shoulders
Size Adjustments
- For ages 1-2: Width 20″, Length 18″
- For ages 3-4: Width 22″, Length 22″
- For ages 5-6: Width 24″, Length 26″
- For ages 7-8: Width 26″, Length 30″
Tips for Success
- Use cotton or cotton-blend fabrics for best results
- Prewash your pillowcase or fabric to prevent shrinkage
- Make sure armhole curves are smooth and even
- Double-check ribbon length before cutting
- Consider adding decorative trim or pockets for a personal touch
A pillowcase dress is wonderfully versatile—wear it alone in summer or layered over a tee in cooler weather. The best part? It grows with your child—just adjust the ribbon ties as needed. As your little one grows, this sweet dress can become a cute top!
Storage and Care
- Remove ribbons before washing if desired
- Machine wash on gentle cycle
- Tumble dry low or hang to dry
- Store on a hanger to prevent wrinkles
Happy sewing, friends! Don’t forget to share photos of your creations; I’d love to see how your little ones style their new dresses.
Keep Stitchin’, Keep Growing
Sewing is a lot like tending a garden or raising animals on the homestead—it isn’t just about the finished product. It’s about creating something meaningful with your own two hands and passing down skills, and about weaving love into every project—every outfit carries a story.
Looking back on my journey from those first uncertain stitches (bless their hearts!) to crafting whole wardrobes for my daughter, my heart is full to bursting. Every project is a teacher—whether it was figuring out how to mend my husband’s work shirts or stitching up Teva’s torn dress. Now my sister and mother are sewing down to a beautiful art. However, I like to tell people that mistakes prove something was handmade. Another rendering is: imperfections are love made visible.
Do not fret about getting everything perfect. You will improve with practice and patient diligence. Sewing is about the joy of making something with your own hands, the peace found in the gentle hum of your machine, and the warmth of gifting something handmade to someone you love. Whether you’re hemming kitchen curtains or creating your first dress, you are stitching precious memories into every seam. Sewing is about making do with what you have, learning as you go, and putting your heart into every stitch. Whether you’re patching up overalls or tackling your first quilt, you’re adding your own chapter to an age-old story of self-sufficiency and creativity through the generations.
So dust off that old Singer, organize your sewing kit, pick out some pretty fabric, and join me at the sewing table. Start small, be patient with yourself, and celebrate every tiny victory in creating something useful with your own hands—turning simple fabric into family treasures. So what do you say? Let’s get stitching together!